

 |
To quickly setup your system and get running, in approximately 10 minutes, follow these instructions:
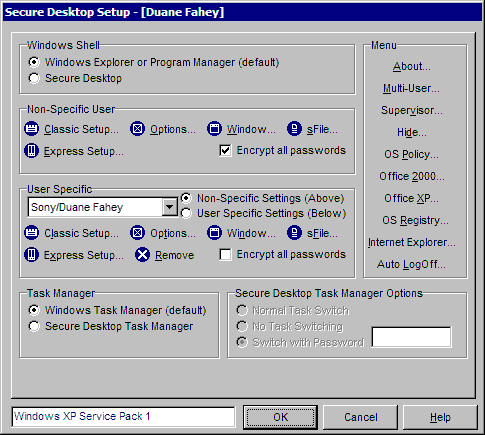
Go to the Secure Desktop group and double-click on the Secure Setup icon
Click radio buttons at the top for Secure Desktop as the shell
Click radio buttons at the bottom for Secure Desktop Task Manager as task switcher
Don't mess with the User Specific settings until you read about Multi-user options.

Choose Options button in the Non-Specific User section
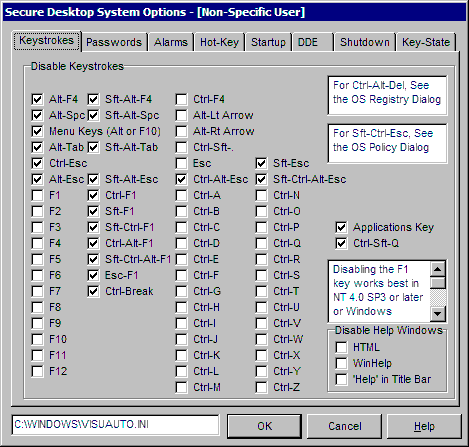
Choose any overall options you may want here and click OK. Be sure to leave the Enable Secure Setup checked. This dialog looks slightly different in other operating system versions. The picture below was captured in Windows XP.

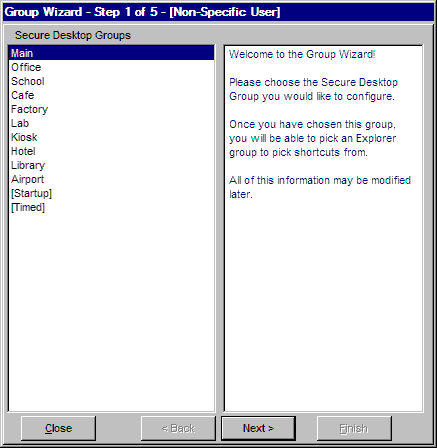
Choose the down arrow next to the Setup button in the Non-Specific User section and choose Express Icon Setup Using The Group Wizard, to get the following dialog:

You will see Group 0, Group 1, Group 2, and so-on on the left side. Just choose Group 0, and press the Next button. There you will see a list of your explorer groups on the left. Choose one of those and press the Next button. Then you will see a list of program icons from within that explorer group that you chose. Use the copy buttons to copy icon information to Secure Desktop then press the Next button. You can now change various pieces of information about the icon, and apply a password to each of them if you want. After clicking the Next button, you can finish the wizard or choose to start from the beginning for more configuration.
When you're back to the Secure Setup dialog, you have two options. You can either go ahead with an OK to replace your shell (must be administrator in NT4/2000/2003/XP), or you can go back to the shell you had by hitting cancel. If you do this, just run Secure Desktop as an application to see your results. That's all there is to it!


 |